If you work with digital images — whether for eCommerce, photography, or graphic design — you’ve likely heard the term “clipping path.” But what exactly is it, and why is it so important? In this blog post, we’ll cover everything you need to know about clipping paths, including how they’re used, who needs them, and how to choose the right service provider.
What Does a Clipping Path Do?
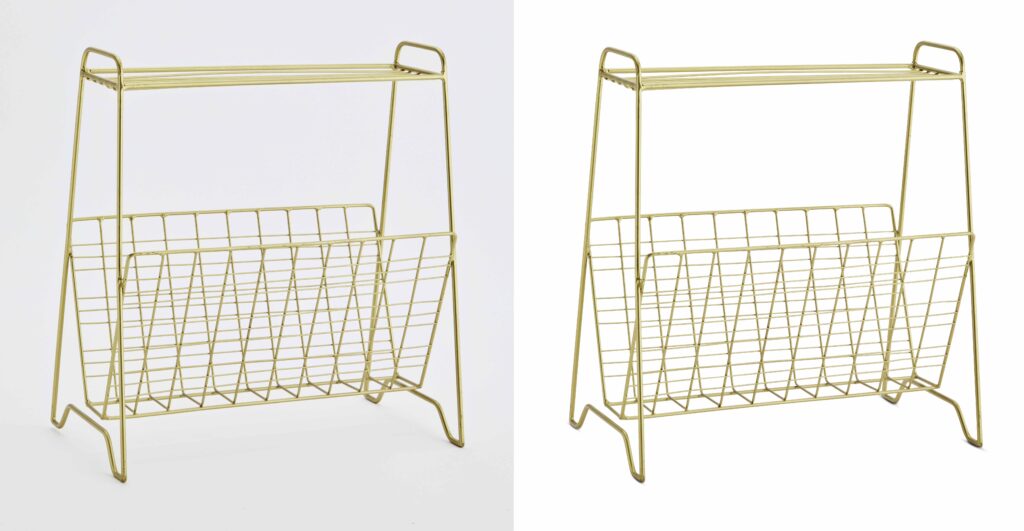
A clipping path is a closed vector path or shape used in image editing software, usually Adobe Photoshop, to cut out a specific part of an image. It allows you to remove the background or isolate a subject without affecting the quality of the image. This is essential for creating product photos with white or transparent backgrounds, commonly used in online stores, catalogs, and marketing materials.
How to Do a Press Clipping?(Step-by-Step)
It’s important to note that “press clipping” and “clipping path” are two different concepts. A press clipping refers to collecting articles, news mentions, or publications related to a brand, company, or individual. This is done manually by searching media sources or by using press clipping services and tools like Google Alerts, Meltwater, or Cession. It has nothing to do with photo editing or graphic design.
- Select the Object: Open your image in Photoshop or Illustrator.
- Choose a Tool: Use the Pen Tool for the most accurate results.
- Create the Path: Draw around the object by placing anchor points along the edge.
- Close the Path: Ensure the first and last anchor points connect.
- Convert to a Selection: Right-click and choose “Make Selection.”
- Apply the Clipping Path: In the Paths panel, save and set the clipping path.
- Edit as Needed: Adjust edges, refine the path, or add feathering if necessary.
- Save or Export: Export in formats like PSD, TIFF, or PNG for use.
How to Make a Clipping Path in Photoshop
Creating a clipping path in Photoshop involves the following steps:
- Open the image in Photoshop.
- Use the Pen Tool (P) to manually draw around the object you want to isolate.
- Make sure the path is closed by joining the start and end points.
- Go to the Paths panel and save the path as a new clipping path.
- You can then export the image with the background removed or replaced.
It requires precision and a steady hand, especially for objects with fine details or complex shapes.
What Services Are Included in Clipping Path Service?
A professional clipping path service may include a variety of options:
- Basic clipping path (for simple shapes)
- Complex clipping path (for intricate objects like hair or jewelry)
- Multi-path for color correction
- Background removal
- Shadow creation or removal
- Ghost mannequin effect
- Image retouching and enhancement
These services are often offered by photo editing companies or outsourcing firms that specialize in bulk image processing.
What Is Another Name for Clipping Path?
Clipping path may also be referred to as:
- Deep etching
- Photo cut-out
- Image clipping
- Silhouette cutting
These terms are often used interchangeably, though “clipping path” is the most technical and widely recognized term in professional design and photography.
Types of Clipping Paths
- Simple Clipping Path: Straightforward objects with few curves (e.g., boxes, phones).
- Medium Clipping Path: Objects with more curves or holes (e.g., shoes, chairs).
- Complex Clipping Path: Multiple curves, holes, and details (e.g., jewelry, bicycles).
- Super Complex Clipping Path: Highly intricate designs or grouped objects (e.g., chains, netting).
Tools Used for Clipping Path
- Photoshop Pen Tool: Best for precise, clean paths.
- Lasso Tool: Good for quick, rough selections.
- Magic Wand Tool: Selects based on color range, less accurate.
- Masking: Alternative for semi-transparent areas like hair or smoke.
- Color Range Selection: Useful for selecting based on specific color tones.
AI vs. Manual Clipping Path
- AI Clipping Path: Fast and automated using AI-based tools, but accuracy may suffer, especially with complex edges.
- Manual Clipping Path: Done by hand using tools like the Pen Tool, offering better precision and control.
What Is the Difference Between Clipping Path and Image Masking?
While both techniques are used for background removal, they differ in how they work:
- Clipping Path uses vector paths and is best for sharp, well-defined edges (like boxes, phones, clothes).
- Image Masking is a pixel-based technique used for soft or fuzzy edges (like hair, fur, or transparent objects).
Masking is more time-consuming but essential for images that can’t be edited cleanly with a clipping path alone.
How Long Does It Take to Complete a Clipping Path?
The time required depends on the complexity of the image:
- Basic objects: 5–10 minutes
- Medium complexity: 10–20 minutes
- High complexity (like jewelry or hair): 30+ minutes
Professional services often provide turnaround times ranging from a few hours to 24 hours for bulk orders.
Who Needs Clipping Path Service?
Clipping path services are essential for:
- eCommerce businesses: Product listing photos
- Photographers: Client edits and portfolio preparation
- Graphic designers: Preparing assets for layouts and advertisements
- Advertising & Marketing agencies: Creating clean visuals for campaigns
- Print and publishing media companies: High-quality magazine and brochure layouts
- Fashion brands
Basically, any industry that uses high-quality, professional imagery can benefit from clipping path services.
Benefits of Clipping Path
Some major advantages of using a clipping path include:
- Clean and professional-looking images
- Background removal for consistent product photos
- Higher conversion rates in online stores
- Improved visual branding
- Flexible use of images across platforms
This makes it a crucial tool for businesses looking to present a polished, high-quality brand image.
What is a Multiple Clipping Path?
This involves creating separate paths for different parts of the same image. It allows selective color correction, shadow adjustment, or masking on individual elements.
What is the Main Requirement for a Clipping Path?
The key requirement is a clear edge contrast between the object and its background, which helps in drawing a precise path.
How to Create a Clipping Path in Illustrator
- Use the Pen Tool to outline the object.
- Go to Object > Clipping Mask > Make to apply.
- Export the final image.
How to Create a Clipping Path in InDesign
- Select the image.
- Go to Object > Clipping Path > Options.
- Choose a method (Detect Edges, Photoshop Path, etc.)
- Apply and adjust.
Example of a Clipping Path
An image of a shoe on a white background with no shadows or distractions is a classic result of clipping path editing.
Importance in Photo Editing
Clipping paths are critical for professional image editing, especially in commercial use. They ensure consistency, highlight the subject, and create visually appealing product photos.
What is a Path in SVG?
An SVG path is a vector shape described by a series of commands (e.g., M, L, C) in XML format. It’s commonly used in web graphics.
SVG Path to Clip Path Generator
You can use tools like Clipping or SVG Path Editor to convert SVG paths into CSS clip-path for web use, allowing complex, responsive image shapes.
How Much Do Clipping Path Services Cost?
Costs typically range from $0.50 to $10+ per image, depending on complexity, quantity, and turnaround time.
How to Choose the Right Clipping Path Service?
When selecting a clipping path service provider, consider the following:
- Quality of work: Request a sample before committing.
- Turnaround time: Choose a provider that meets your deadlines.
- Experience and portfolio: Look for expertise in similar industries.
- Customer support: Responsive communication is key.
- Pricing: Compare rates, but don’t compromise quality for low cost.
A reliable provider can be a long-term asset for your visual content needs.
Final Thoughts
A clipping path is more than just a photo editing technique — it’s an essential part of digital branding and visual marketing. Whether you’re a photographer, online retailer, or graphic designer, using clipping path services can elevate your image quality and help you stand out in a competitive marketplace.

Its nice work, I like it!